Showing posts with label Gift Card Holder. Show all posts

Friday, October 31, 2014

November Stamp of the Month Blog Hop - It's the Little Things

Welcome to our November Stamp of the Month Blog Hop! 

We will be featuring November's SOTM, It's the Little Things.  If you have come here from  Haley's Blog, you are on the right path! The blog hop is a great big circle, so you can start here and work your way all around.  If you get lost, click HERE to find the complete blog hop list!

When I saw this group of stamps I thought how fun it would be to random stamp an entire sheet and then cut a gift ensemble from it!


I used analogous color families like blues and greens, yellows and oranges, and purples and pinks to layer inks while keeping them from looking muddy.

To give things a bit of sparkle I added dots from our Silver Metallic Marker on all the tiny orange flowers and the centers of the purple and pink flowers before cutting with my Cricut.


Our thin Thistle Diagonal Striped Ribbon was perfect to tie up the gift card holder and add the tag to the bag.  I did use a small velcro dot on the bag to keep it closed as well.


Here is the Explore Design Space file for this ensemble.  It uses one 12x12 random stamped or patterned paper and one 8.5x11" sheet of white cardstock.   


Here is the list of colors and stamping order I used:
Purple Flower:  Thistle and Gypsy
Pink Flower:  Pixie and Thistle
Yellow Flower:  Canary and Goldrush

To purchase the SOTM for just $5 with $50 purchase or any of the other items needed to make this project, visit my shopping site!


Now hop on over to Jilena's Blog here and see what she has created!


Wednesday, December 2, 2009

Holiday Gift Card Holders Tutorial made from CTMH Holiday Photo Greetings Card Kit and CTMH Jingle Borders

I created this post for a later release date but am posting it now because the card kit featured in this project is IN THE CLEARANCE SALE (DEC. 2-17th) FOR JUST $6.50! I love how these gift card holders came out! Any of our Level 1 paper packs or card kits or stickease work GREAT for making lightening fast cards! Everything in the sale is 50-80% off with FLAT RATE $5 shipping on orders $100+ (under $100 is $7.95). Is that a rockin' sale or what?!?!?! Click here to hit my site and get some of those deals under YOUR tree this year!


Over the summer Close to my Heart had a rockin' "mystery box" special and I was lucky enough to get a couple of boxes stuffed full of goodies including the retired Holiday Photo Greetings 6x6" card kits. I don't usually send photo cards BUT I immediately saw the potential of using these kits for other things. Each one of our card kits comes with three sheets of stickease and 12 card bases so I knew I had a lot of material to work with. I punched out the inset that was ready for removal (the place where your photo would go) and used just that part along with the stickease and some white cardstock to create these awesome gift card holders with my daughter. We had such a fun afternoon making these!

If you happen to have one of these kits (or any other CTMH card kit) here is a quick tutorial for making some of these on your own!

Gift card base: 5"x8.5" (score at 3.5" and 7")
Card front: Section of card front measuring 3.25x4.75" - we ran ours through the Cuttlebug with the snowflake emobssing folder

1. Fold up the gift card base - you'll have a 1.5" tab at the bottom.
2. Punch a half circle out of the middle of the 1.5" section to create a "pull" spot for the gift card.
3. Stamp a border across this 1.5" section and decorate (here we used one of the stamps from Jingle Borders and my daughter colored them in with our Watercolor Pencils)
4. Adhere just the sides of this section to make a pocket.
5. Adhere the card front and decorate with stickease as you desire - designing is half the fun!
6. Use pop dots and liquid glass to jazz things up!

Here is the inside view of the gift card holder with the colored border and punch out shown.


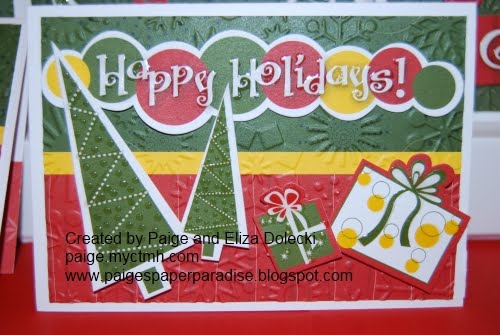
Some close up examples of the cards - we wound up making a total of 14 by cutting up one of the 6x6" photo cards (we used the back and the front pieces and pieced them together).


Related Posts with Thumbnails

Blog Archive

Copywrite - or sharing the love!

Thank you for visiting me here on my blog today! I hope you have been inspired by my postings to create something lovely for yourself! It does take me a whole lot of time to create the artwork, tutorials and posts for this blog so if you would like to borrow my wording or artwork then I respectfully ask that you e-mail me for permission, credit me and/or link back to my blog. Thanks for your understanding and respect!

Paige