Showing posts with label Boy Cards. Show all posts

Monday, February 15, 2016

Heart2Heart Challenges - Shades of Red

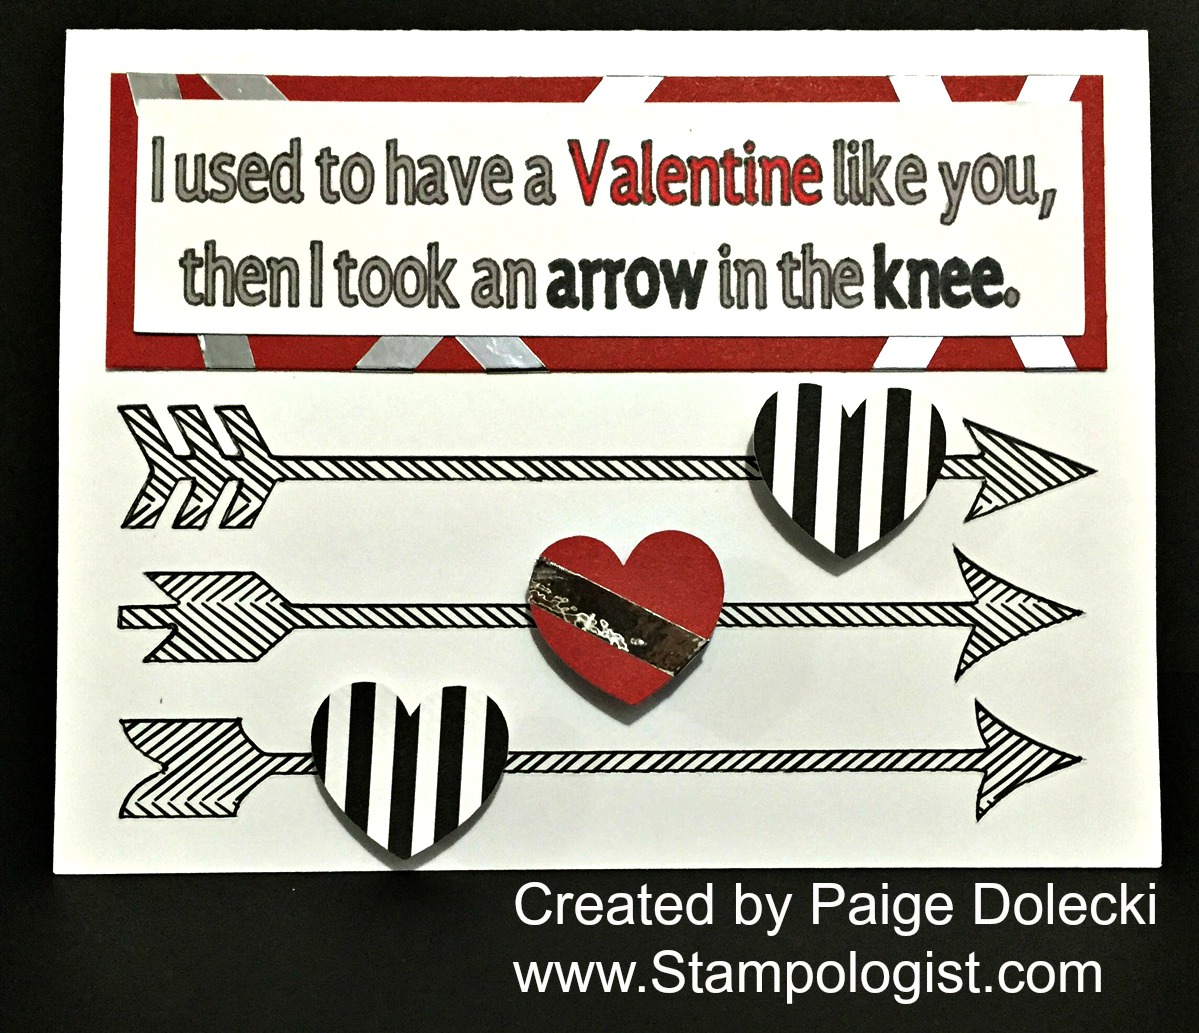
This is my Design Team project for Heart2Heart Challenge's "Shades of Red, Black and White" challenge this week.  I had one last Valentine to make today - one for my 14 year old son.  His primary interest is video games so I altered a meme from the Skyrim franchise.  I thought I'd explain it because if you don't have a gamer in the house the sentiment on this card probably seems really, really weird!
I used our La Vie En Rose paper pack for all the lovely black and white papers on this card and mixed it with Ruby cardstock.  The arrow card base is from our Artfully Sent cartridge and I had my Explore write the font from the Artiste cartridge so I could fill in with Shinhan Touch Twin markers and empahsize certain words. I outlined the arrows with our Journaling Pen and added some fun Silver Foil Tape to pop things up a bit.
The inside of the card has a fun heart border from Artistry layered with black underneath the stripes to give it a fun 3-D effect.
Hopefully my kiddo will like this one (I know he'll like the chocolate I bought him)! Thanks for stopping by today and I hope you'll hop on over to the Heart2Heart Challenges blog and join the fun in our "Shades of Red, Black and White" challenge!
Stay crafty my friends!

Paige


Wednesday, January 21, 2015

Seahawks Inspired Cards - January Card Buffet

These two projects were inspired by the Seattle Seahawks going to the Super Bowl!  Projects #10 and 11 for our January Card Buffet!

This one comes from our Artbooking cartridge - love those fun overlays!

This one is from our new Artfully Sent Cricut Cartridge - so many cards to choose from on that cartridge!

Join me on Thursday, 22 Jan at 12PM or Friday, 23 Jan at 7PM for our $15 all you can create in 2 hour class!  It is going to be lots of fun!

Paige

Friday, October 3, 2014

Big Top Birthday Celebration Card

This is one of 17 different cards I had available to make at my Card Buffet last week.  

Now that you've seen this adorable cuteness, I know you want to sign up for my next Card Buffet on October 24th from 7-9PM!  Its just $15 for 2 full hours of all you can "eat" cardmaking!  To RSVP your spot at the table, contact me at:

Paige@Stampologist.com


Check out the Gold Polka Dotted Washi tape - isn't it awesome?!?

I fell in love with this adorable circus stamp when it debuted in the last Idea Book.  All my crafty friends know I'm a sucker for critter stamps!


Hope to see you on Friday, 24th October for my next Buffet!

Stay crafty my friends,

Paige

Wednesday, September 10, 2014

Whale of a birthday card with Free DS Explore file

Finally getting around to sharing the fun birthday card I made for my son this year using my new Cricut Explore.  I'm loving that new machine! 
I used the Brooklyn Iron On cartridge for the whales and changed the detail cut line to a writing line using a silver pen.  I added a couple of googly eyes (yeah, I've got a thing for them) and some glitter gel to the spout.  The paper is our retired Tommy pack - love that map paper for nautical cards!  The Happy Birthday sentiment is from one of our CTMH carts (you can always replace it with another sentiment if you don't have that cart).

Here is the cut file using Design Studio for the Explore if you'd like to make this fun card!

https://us.cricut.com/design/#/canvas/project/18626549

Thanks for stopping by today!

Paige


Monday, July 22, 2013

Video Tutorial - Pop-Up Card using Acetate to Create Floating Images

This week's challenge at Heart2Heart Challenges is "Water, water everywhere!".  I had to chuckle when I saw a preview of the projects as many of us chose Surf's Up paper because its PERFECT for this challenge!  I used our new Artbooking cartridge to create my fish card but I also created a Video Tutorial using Artiste cuts so YOU can create a card using this technique today!  The video is at the bottom of the post so be sure to scroll down!

 
Above you can see how I took elements from the pre-designed scrapbook layout in Artbooking and used them for a card simply by re-sizing using the "read dial size" key.  The frame is actually a 4x6" photo mat that I resized to 4" actual size.
On the inside of the card I sandwiched strips of clear plastic between the front half of the card and the back half to create this fun wiggly pop up.  When you move the card, the fish look like they are swimming - the googly eyes just make them all the sillier!  I also dabbed on some silver glitz to the wave cut outs to give them some sparkle and shine.
The fish are SO FUN to play with!

Now here is the Artiste sample my video below will show you how to create!
Here is the VIDEO TUTORIAL on how to create a pop up card using acetate strips to create floating images.
  ***IF YOU ARE GETTING THIS VIA E-MAIL you need to click out to my blog to see the video!***


Measurements to copy exactly:
Card front and card back cut at 5.5"x4.75" and score .5" along the long edge to create the gutter
Acetate is cut at .5" wide (2) at 1.75", (1) at 2", (2) at 2.5" and (1) at 3"

I hope you enjoyed this technique and my video!  If so, pop out to my You Tube or my Facebook page and give me a like or a comment to let me know what else you'd like to see me do for a video!

You can purchase Artbooking through me as a pre-order now (ships on August 1) but Artiste can be ordered today by clicking HERE to visit my online ordering site!

Stay crafty my friends,

Paige
Related Posts with Thumbnails

Blog Archive

Copywrite - or sharing the love!

Thank you for visiting me here on my blog today! I hope you have been inspired by my postings to create something lovely for yourself! It does take me a whole lot of time to create the artwork, tutorials and posts for this blog so if you would like to borrow my wording or artwork then I respectfully ask that you e-mail me for permission, credit me and/or link back to my blog. Thanks for your understanding and respect!

Paige